Managing OpenPGP Keys
This instruction will guide you step-by-step through creating OpenPGP public/private key pairs, exporting public keys to key servers, and finding OpenPGP public keys for secure communication with others.
First step before start
First read the instructions in OpenPGP Best Practices carefully to ensure your system generates a strong key and receives key updates from a well-maintained keyserver. This will require to make changes to the gpg.conf configuration file, which is located in different places depending on your operating system. In Linux it is located in ~/.gnupg/gpg.conf.
Linux
Using GNOME’s GUI frontend: Seahorse
What is Seahorse?
Seahorse is a GUI tool for creating and managing OpenPGP keys, securely storing passwords, and creating and managing SSH certificates. It uses GPG as the back-end OpenPGP implementation.
Create and export an OpenPGP Public/Private Key pair
- Launch Seahorse. It should be installed by default.
- Select GnuPG keys.
- Select the + sign to create a new key.
- Select PGP Key.
- Enter your email and the name you would like to be associated with the key. This doesn’t need to be your real name.
- Select advanced options.
- Encryption type should be RSA.
- Key strength should be 3072.
- Expiration date should be within less then two years. You can always extend the key expiration as long as you still have access to the key, even after it has expired. Why should I set an expiration -.
- Enter a strong password that you can remember. If you forget this password, it cannot be recovered and any encrypted data you have using it for, including emails, will be permanently inaccessible.
- The computer will now generate the key, which may take some time. After this, you will have an OpenPGP key pair that is ready to be used—Great! You can manage the key options, export the public key, change the password, delete and/or revoke the key, and perform other key adjustments through the Seahorse user interface or the command line.
- Optional: At this point, you can publish your public key to a key server where people can request it remotely to be able to send encrypted data and emails to you. Before you continue, please make sure you have selected a good keyserver. Once you are ready:
- Select the Key(s) you want to publish. Hold Ctrl and click to select more than one, or press Ctrl+A to select all keys.
- Navigate to Remote → Sync and Publish Keys…
- Press the Key Servers button.
- Publish the keys to any keyserver (select one if the “Sync” button was grayed out in the previous screen); they all synchronize with each other, so your key will be on each one.
- Recommended: Check the Automatically retrieve keys from key servers but do not check the Automatically synchronize modified keys with key servers check boxes. Instead, please consider using parcimonie.
- Press the Close button and then the Sync button to synchronize your keys.
Your public key is now published on the key servers and is accessible to others!
Find or import someone else’s OpenPGP Public Key
If you want to communicate with others securely or encrypt data that only they can read, you first need to import their public key into your keyring. Note: The John Q. Alias key is used as an example key for generating a key above and also for importing a key below; in the case of importing, it is used to refer to the person for whom you’re searching, not yourself.
Import from a key file
If someone exports their key to a file and sends it to you, you can import it into your keyring via Seahorse by:
- Navigating to File → Import…
- Locate where you saved the key file, selecti it, and pressi the Open button.
The key that was stored in the key file has now been imported into your keyring!
Searching on keyservers
- Navigate to Remote → Find Remote Keys… in Seahorse
- Type some key words (a name or alias) to search the key servers. The best way to find someone is to search for their email address, as it’s uniquely tied to them.
- Select and review the keys that are returned to determine whether the key(s) returned belong to the person you’re looking for. You can review additional information about the key by pressing the Properties button.
- Once you’ve determined and selected the key(s) you want to import into your local keyring, press Import.
Their public key has now been imported into your keyring!
Verifying a key
Anyone can publish a key on a keyserver. For example, for a fun trick, try searching for Edwards Snowden’s key. There are many, many keys! Before you start using a key, you should verify the key’s fingerprint with the individual with whom you wish to communicate. You should not do this by email! The best practice is to verify the fingerprint in person. At a minimum, you should use voice/video to confirm that you have the right key. To verify the fingerprint, you can use the following steps:
- Open seahorse
- On the view menu, select show any
- Locate the key that you have already imported
- Select properties (right click)
- Select details
- Confirm with the key’s owner that the fingerprint listed is correct
After you have carefully reviewed the fingerprint and verified its accuracy with the owner of the key, you may sign their key with your key. To do this:
- From the same window as above, select the Trust tab and press the Sign this key button.
- Sign the key, indicating how carefully you’ve checked the key. Selecting Not at all still allows you to use the key for email and data. You can also opt to be able to revoke your signature later or make it so that only you can see that you’ve signed the key.
- Press Sign.
You can now begin encrypting data that can only be decrypted by the key owner and establish a secure communication line between you and the key owner!
Using the Linux command line
This is based on the Ubuntu GPG Howto
Ensure that you have already set the right defaults
Please first review the OpenPGP Best Practices guide to ensure that you have set your defaults correctly. Do this before proceeding!
Generate an OpenPGP Key pair using GPG
Press Alt+F2 and type: gnome-terminal and then press enter
In the terminal, type: gpg --gen-key
which should return a menu similar to this:
Please select what kind of key you want:
  (1) RSA and RSA (default)
  (2) DSA and Elgamal
  (3) DSA (sign only)
  (4) RSA (sign only)
Select the type of key you want. RSA and RSA is the recommended type. (sign only) keys cannot be used for encryption.
Next, enter the key size you want. 3072 is recommended.
What keysize do you want? (2048)Then enter the length of time that you would like the key valid for and then press y to confirm the expiration date. If you select 0, the key does not expire and will require to be revoked when you no longer wish to use it. It is recommended - to have your key expire within no more than 2 years.
Please specify how long the key should be valid.
     0 = key does not expire
   <n> = key expires in n days
   <n>w = key expires in n weeks
   <n>m = key expires in n months
   <n>y = key expires in n years
Key is valid for? (0)
Enter your name, email address. It is not recommended to use a comment. Your name and email address can be anything you want, not necessarily your real name or email address. If you want to use your OpenPGP key for encrypting email, put the email address you want to use with encryption in the “Email address” prompt.
You need a user ID to identify your key; the software constructs the user ID
from the Real Name, Comment and Email Address in this form:
  "Heinrich Heine (Der Dichter) <heinrichh@duesseldorf.de>"
Real name: John Q. Alias
Email address: the-email-youre-going-to-use@whatever.tld
Comment:
Now enter a strong password that you can remember. If you forget this password, it cannot be recovered and any encrypted data you have using it, including emails, will be permanently inaccessible. Hit enter when complete to begin generating the key.
Your OpenPGP public/private key pair has been generated!
List your keys
You can use this command to list your keys:
gpg --list-secret-keys
This should output data in a format like this:
sec   4096R/0xE361D8GH916EFH89 2014-05-14 [expires: 2016-05-14]
      Key fingerprint = 1234 5678 90AB CDEF GH01  2344 5678 9012 ABCE FGH1
uid                            John Q. Alias <the-email-youre-going-to-use@wherever.tld>
ssb   4096R/0x40339E25E2F2D99E 2014-05-14
Any reference to your KEY-ID below can be found using the first command and looking at the output. The line you’re looking at to find the KEY-ID is the sec line of each of the entries). The line contains sec, the key strength and type abbreviation (4096R in the first line), a slash, the KEY-ID, and then the creation date. The codebox below highlights the KEY-ID:
sec   4096R/0xE361D8GH916EFH89 2014-05-14 [expires: 2016-05-14]
            ^KEY-ID^
      Key fingerprint = 1234 5678 90AB CDEF GH01  2344 5678 9012 ABCE FGH1
uid                            John Q. Alias <the-email-youre-going-to-use@wherever.tld>
ssb   4096R/0x40339E25E2F2D99E 2014-05-14
So for this example, the KEY-ID would be E361D8GH916EFH89.
However, as discussed here you should not rely on the keyid! Instead, you should use your full fingerprint for all operations.
Export/Publish your public OpenPGP Key
- Press Alt+F2 and run
gnome-terminal - Create an ASCII armored version of your public key for exporting by typing:
gpg --export -a <<fingerprint>> > mykey.asc
You’ve just exported your ASCII armored OpenPGP public key to the file mykey.asc in the folder you were in (your home directory, if you opened a new terminal). Now you can send the key to whomever you want to be able to encrypt files to you.
Publish your OpenPGP public key to a Key server
At this point, you can publish your public key to a key server where people can request it remotely to be able to send encrypted data and emails to you.
- Press Alt+F2 and run:
gnome-terminal - type
gpg --send-keys <<fingerprint>>
where <> is the fingerprint of the key you wish to publish on the key servers. Hopefully, you have already configured a good keyserver.
Windows
The windows version of this guide is out-of-date. If you are a windows user, you can help us update it! Please see our github repository for our help pages to learn how
It is not recommended to use Windows as a secure communication platform. While Windows can be locked down to provide a more secure environment than is provided by default, the tendencies in Windows lean towards very lax security. There is also a multitude of pre-built exploits for windows that make it easier for attackers to compromise. Here are some bullet points against using windows for secure communications:
- widespread distribution of malware/trojans/viruses that could log key strokes, bypassing encryption schemes and/or logging other information
- targeted hacking and malware installation is actively used by governmental agencies with Microsoft being most susceptible
- Usually uses an unencrypted filesystem, main encryption tool is proprietary and cannot be scrutinized for exploits, back doors, or other weaknesses.
- User accounts are administrators by default
- Since Windows is proprietary and closed-source, there is no outside scrutiny for defects, back doors, or anything that “phones home”. You’re trusting Microsoft completely with whatever secrets you choose to put on your computer.
To ensure a secure communications platform, it’s recommended to install a GNU Linux free software distribution, like Debian (recommended), Ubuntu (beware privacy issues) or a derivate.
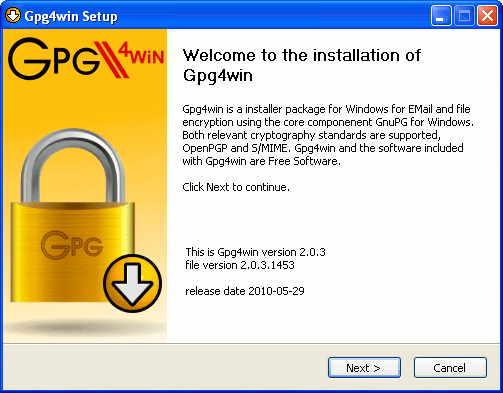
Install Gpg4win
Gpg4win is the recommended OpenPGP implementation for windows. It is Free Software, licensed under the GPL, with the source code available for modification or scrutiny.
- Download Gpg4win
- Double click the executable and begin the installation.
- Select the language you’ll be using.
- You’ll be greeted by the welcome screen. Press Next to continue.
- Next, you’ll be asked to agree to the GNU General Public License (the GPL license), which can be read in its entirety at GNU.org. If you accept, press Next.
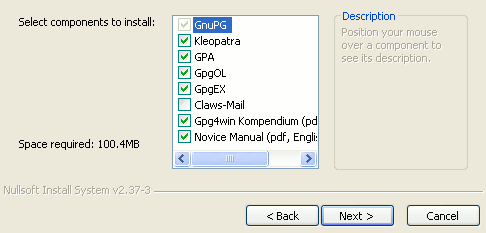
- Choose the components you want to install. The default options are recommended. Claws-Mail is a powerful cross-platform email client available for Linux, Windows, Mac OS X, and others. GpgOL installs the plugin necessary to use OpenPGP keys with the Outlook mail client.
- Select the install folder (the default is recommended).
- Choose what shortcuts to create.
- Choose a name for any shortcut folders and then begin the installation. Choose to view the README file, or not, and then click finish.
Gpg4win is now installed and ready to use!
Create and Export an OpenPGP Public/Private Key pair
Kleopatra seems to be the more recent and more polished of the two Gpg4win key manager GUI frontends on Windows, so this guide recommends using that.
- Launch Kleopatra by the shortcut you installed (default: Start → All Programs → Gpg4win → Kleopatra)
- Click File → New Certificate… or Ctrl+N.
- Press the Create a personal OpenPGP key pair button.
- Enter your name, email address, and a comment if you wish. Your name and email address can be anything you want, not necessarily your real name or email address. If you want to use your OpenPGP key for encrypting email, put the email address you want to use with encryption in the “Email address” box. When finished, click the Advanced Settings… button.
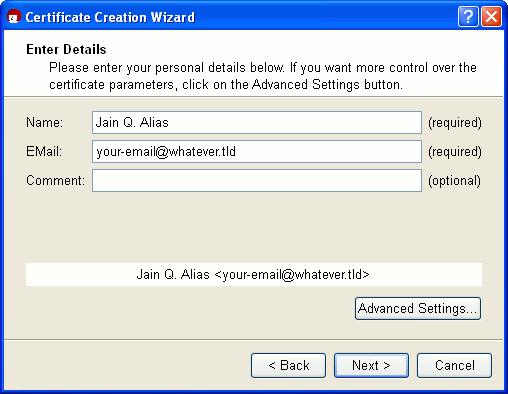
- In the Advanced Settings… dialog box, choose your key type and key strength. RSA, using key strength of 4,096 bits, for Signing and Encryption are recommended. When finished with the key settings, press OK to close the dialog box, then click Next.
- Review the information for the key, then press the Create Key button.
- Enter a strong password that you can remember. The password strength meter will give you a relative indication of how strong the password is. Getting 100% is strongly recommended. If you forget this password, it cannot be recovered and any encrypted data you have using it, including emails, will be permanently inaccessible.
Your key pair is now finished! From here, you can do one of the following:
- Make a backup copy of your certificate (key)
- Send the Certificate by email
- Upload the certificate to a Directory Service (key server)
- finish the wizard
It is recommended to upload the certificate to a directory service. This will upload your public key to a key server where it can be used by others to encrypt data and emails that only you can decrypt.
Find or Import someone else’s OpenPGP Public Key
If you want to be able to communicate with someone securely or encrypt data that only they can read, you need to import their public key into your keyring first.
Import from a key file
If someone exports their key to a file and sends it to you, you can import it into your keyring via Kleopatra by:
- Pressing the Import Certificates button, then
- Locating where you saved the key file, selecting it, and pressing the Open button.
The key that was stored in the key file has now been imported into your keyring!
Find on the key servers
- Navigate to File → Lookup Certificates on Server… in Kleopatra
- Type some key words (a name or alias) to search the key servers. The best way to find someone is to search for their email address, as it’s uniquely tied to them.
- Select and review the keys that are returned to determine whether the key(s) returned belong to the person you’re looking for. You can review additional information about the key by pressing the Details… button.
- Once you’ve determined and selected the key(s) you want to import into your local keyring, press Import.
Their public key has now been imported into your keyring! Once you have verified the fingerprint (see above about why this is important), you may sign the key.
Sign their key (Certify their Certificate)
To do this,
- Click the Imported Certificates or Other Certificates tab.
- Right click the key you want to sign and click Certify Certificate…
- Select the user ID you want to certify and press Next
- Choose whether you want this certification to be visible to others or only to yourself and then press the Certify button.
You have now signed their key (certified their certificate) and are ready to begin encrypting data or emails that only they can decrypt!
Mac OS X
Unfortunately we have no MacOS version of this guide. If you are a MacOS user, you can help us update it! Please see our github repository for our help pages to learn how
It is not recommended to use Mac OS X as a secure communication platform. While there are fewer exploits and a better security model than windows, OS X has demonstrated a poor security patch speed in the past and has a large quantity of proprietary software and packaging, making it not capable of scrutiny for efects, back doors, or anything that “phones home”. Furthermore, it offers features that can be exploited by hackers or abused by governments or corporations. Some bullet points about OS X security:
- Relies on a lot of proprietary software that can’t be modified or scrutinized by you
- The webcam can be remotely turned on, offered as a “feature” if the laptop gets stolen, which could be abused or exploited to violate your privacy
- Filesystem not encrypted by default and the primary tool available may have inadequate security.
To ensure a secure communications platform, it’s recommended to install a GNU Linux free software distribution, like Debian (recommended), Ubuntu (beware privacy issues) or a derivate.